

Hunting Draw Results: What to Do Next to Prepare
TL;DR: Drawing a hunting tag is only the beginning. Before opening day, confirm your tag details and deadlines, review unit-specific regulations, scout the area, plan access and logistics, and get your tagging system ready. Hunt-Tag helps you prepare for the post-harvest step with kits that keep required tag information protected, readable, and organized in the field.
That email finally hits your inbox. You open it, read it twice, and there it is. After years of building points and waiting for your shot, you drew the tag.
Now the countdown starts.
Opening day may still be weeks away, but the excitement is already real. There is terrain to learn, rules to double-check, gear to sort, and a hunt plan to build before you ever step into the field.
At Hunt-Tag, we know a drawn tag can represent years of patience, money, and planning. That makes the next step simple: get ready before the pressure starts. This guide walks you through what to do after drawing a hunting tag, from confirming the details to preparing for the moment your hunt finally comes together.
Confirm Your Tag Details and Purchase Deadlines
Before you start planning the rest of your hunt, make sure your tag is officially secured. Seeing your name in the draw results doesn’t always mean the process is finished.
Many states require successful applicants to purchase or claim their tag within a set period after the results are posted. If you miss that deadline, you could lose the tag.
Log in to your state wildlife agency account and check:
- The species, sex, and weapon type listed on your tag
- Your specific unit or hunt area
- Your season dates
- Any purchase deadlines or extra fees
- Whether your tag is digital or needs to be picked up in person
Save a copy of your confirmation so it’s easy to access later. Keep a screenshot on your phone and another backup somewhere safe. If your state issues a physical tag, find out where to get it and what identification you need to bring.
Review Unit Specific Regulations
Every hunt unit can have its own rules. State regulations give you the big picture, but the details for your specific unit tell you what’s legal where you’re hunting.
Before opening day, check your state’s big game regulations for:
- Legal hunting hours and weapon restrictions
- Antler point rules or other harvest requirements
- Bag limits and whether your tag covers more than one animal
- Required hunter orange or other safety gear
- Access rules for private land, wilderness areas, or tribal boundaries
- E-tagging rules versus paper tag requirements
Some states use electronic tagging, while others still require physical paper tags. In some cases, the system can vary by species or hunt unit.
Because regulations can change from year to year, always confirm the current rules with your state wildlife agency. Taking a few minutes to review your tagging requirements now can help you avoid problems later in the field.
Scout Your Unit Before the Season
You have time before opening day to learn the terrain, so use it. Start with digital scouting through tools like Google Earth. These can help you study public land boundaries, access roads, water sources, meadows, trailheads, private land, elevation changes, and possible glassing spots before you ever leave home.
If you can, visit the unit before the season starts. A summer scouting trip can help you check road conditions, find possible camp spots, and compare what you saw on the map with what is on the ground.
You can also contact local wildlife biologists for general information about access, habitat, and animal activity in the area. For public land planning, use accurate maps from trusted sources to study boundaries, roads, and access before your hunt.
Plan Your Access and Logistics
A tag gives you the chance to hunt, but you still need a solid plan for getting into the area, staying there, and getting back out. Before opening day, work through these details:
- Transportation: Decide how you’ll reach your hunting area. You may drive to a trailhead each day, camp nearby, or pack into the backcountry. Each option requires different gear, timing, and backup plans.
- Lodging: If you’re traveling out of state, book your stay early. Hotels and cabins near popular hunting units can fill up quickly. It also helps to have a backup option in case your first choice is unavailable.
- Physical preparation: Steep terrain and high elevation can wear you down fast. If your hunt involves long climbs or heavy packs, start training well before the season. Regular hikes with a loaded pack can help you prepare.
- Meat care: Think through what happens if your hunt is successful. Have coolers, game bags, and a plan for getting the meat to a processor or freezer. In warm weather, good meat care starts as soon as the animal is down.
- Emergency contacts: Know where you can find cell service, the nearest hospital, and who to contact if something goes wrong. Share your route and trip plan with someone who isn’t hunting with you.
Make Your Tagging Setup Part of the Hunt Plan
You already spend time checking your weapon, breaking in your boots, and packing the gear you know you will need. Your tagging setup deserves the same attention. Once the animal is down, that’s not the time to be searching for a pen, protecting a wet tag with whatever you can find, or wondering where your confirmation details went.
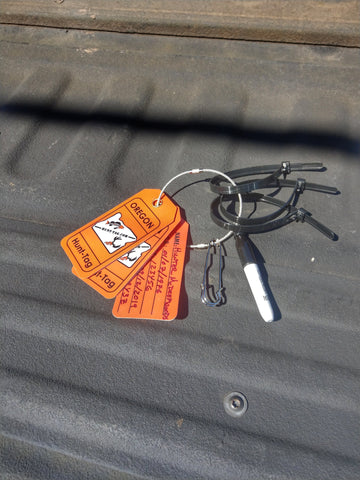
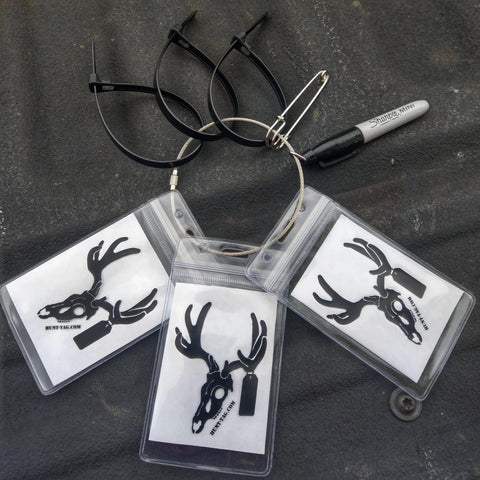
Hunt-Tag Kits are built to help keep your required harvest information protected, readable, and organized in real field conditions.
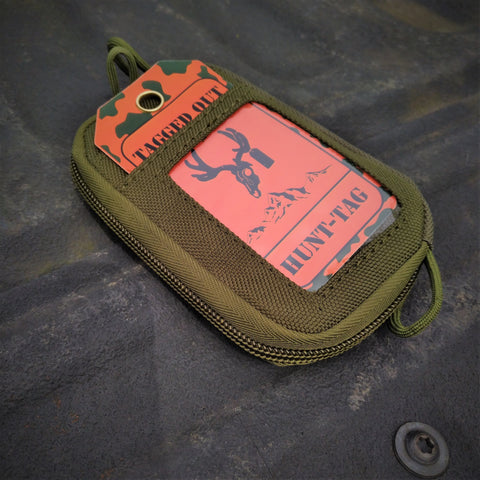
If your state uses paper tags, the Paper Tag Kit helps keep them secure. For hunters who need more flexibility, the Tagged Out Generic Tag Kit works across multiple states and species.
You can also keep your phone, backup battery, and other small essentials organized in the Tech Pouch.
Don’t leave the final step of your hunt to chance. Add your tagging system to your pre-season checklist now, and shop Hunt-Tag Kits before opening day.
Frequently Asked Questions
How long do I have to buy my tag after drawing?
Deadlines vary by state. Some give you only a few days, while others allow several weeks. Check your state wildlife agency account as soon as the draw results are posted so you don’t miss the purchase window.
What if I can’t hunt the tag I drew?
Many states allow returns, transfers, or other options under certain conditions. Refund rules and deadlines vary, so contact your state wildlife agency as soon as you know you can’t use the tag.
Do I need to visit my unit before the hunt?
Not always, but an in-person scouting trip can help you check access, terrain, roads, and possible camp locations. If you can’t visit, digital scouting and calls to local wildlife or land management offices can still help.
What’s the difference between e-tagging and paper tagging?
E-tagging usually lets you validate your harvest through a state app or website. Paper tagging uses a physical tag that you complete and attach after harvest. Some states use one system, while others use both, so always check your specific rules before opening day.
Ready to turn your drawn tag into a fully prepared hunt? Shop Hunt-Tag Kits and get your tagging setup ready before opening day.